
Not long ago I was coming home and noticed a beautiful wooden door on the side of the street, so I hauled it up 3 flights of stairs to my house. I live on a stair street, not a regular car street. I wasn't quite sure what to do with the door, but I knew that it had great potential. After a few weeks of trying to figure it out, I finally came up with this outdoor shelf for my starter plants. You could just as easily use this inside your home for books or bric-a-brac. The best thing about this project is that it was practically free. I aged the door even more with Americana Decor Chalky Finish Paints and Crème Wax in Golden Brown. Next time you see a door on the street, bring it home!

My lovely outdoor plant shelf

Flower Market in French

Watch the video tutorial
YOU'LL NEED
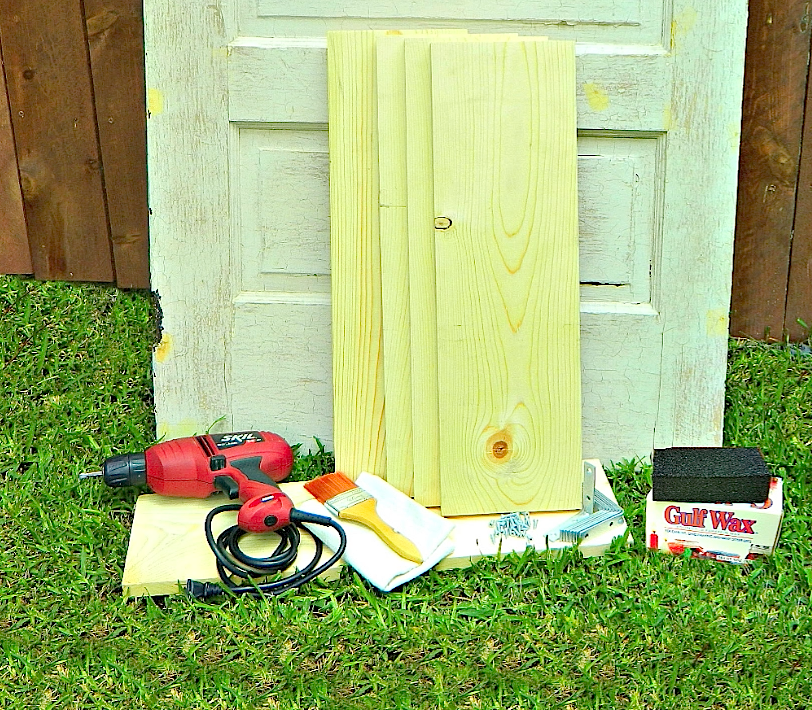
Old beat up door
Five 1"x12"x24" pine boards
Drill
10 "L" brackets
Sanding block or sander
Paintbrushes
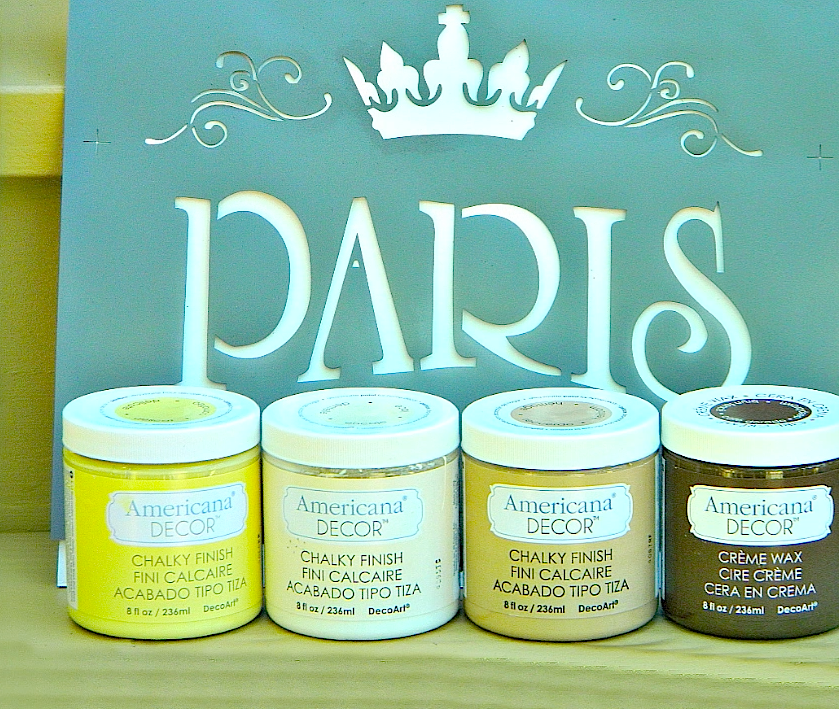

1. Paint large patches of Lace and Heritage all over the door and shelves. Don’t worry about being neat or creating a pattern, just go crazy and be random. Leave some of the original color of the door showing if you like the original color. If not, cover everything with the large patches of paint.

2. Rub wax over the details of the door and over the patches you just painted.
3. Paint over the entire door in Delicate and let dry for 30 minutes.
4. Sand the door with a sanding block to reveal the areas where you applied the wax. The base colors will start to show through and the door will start to look more aged.
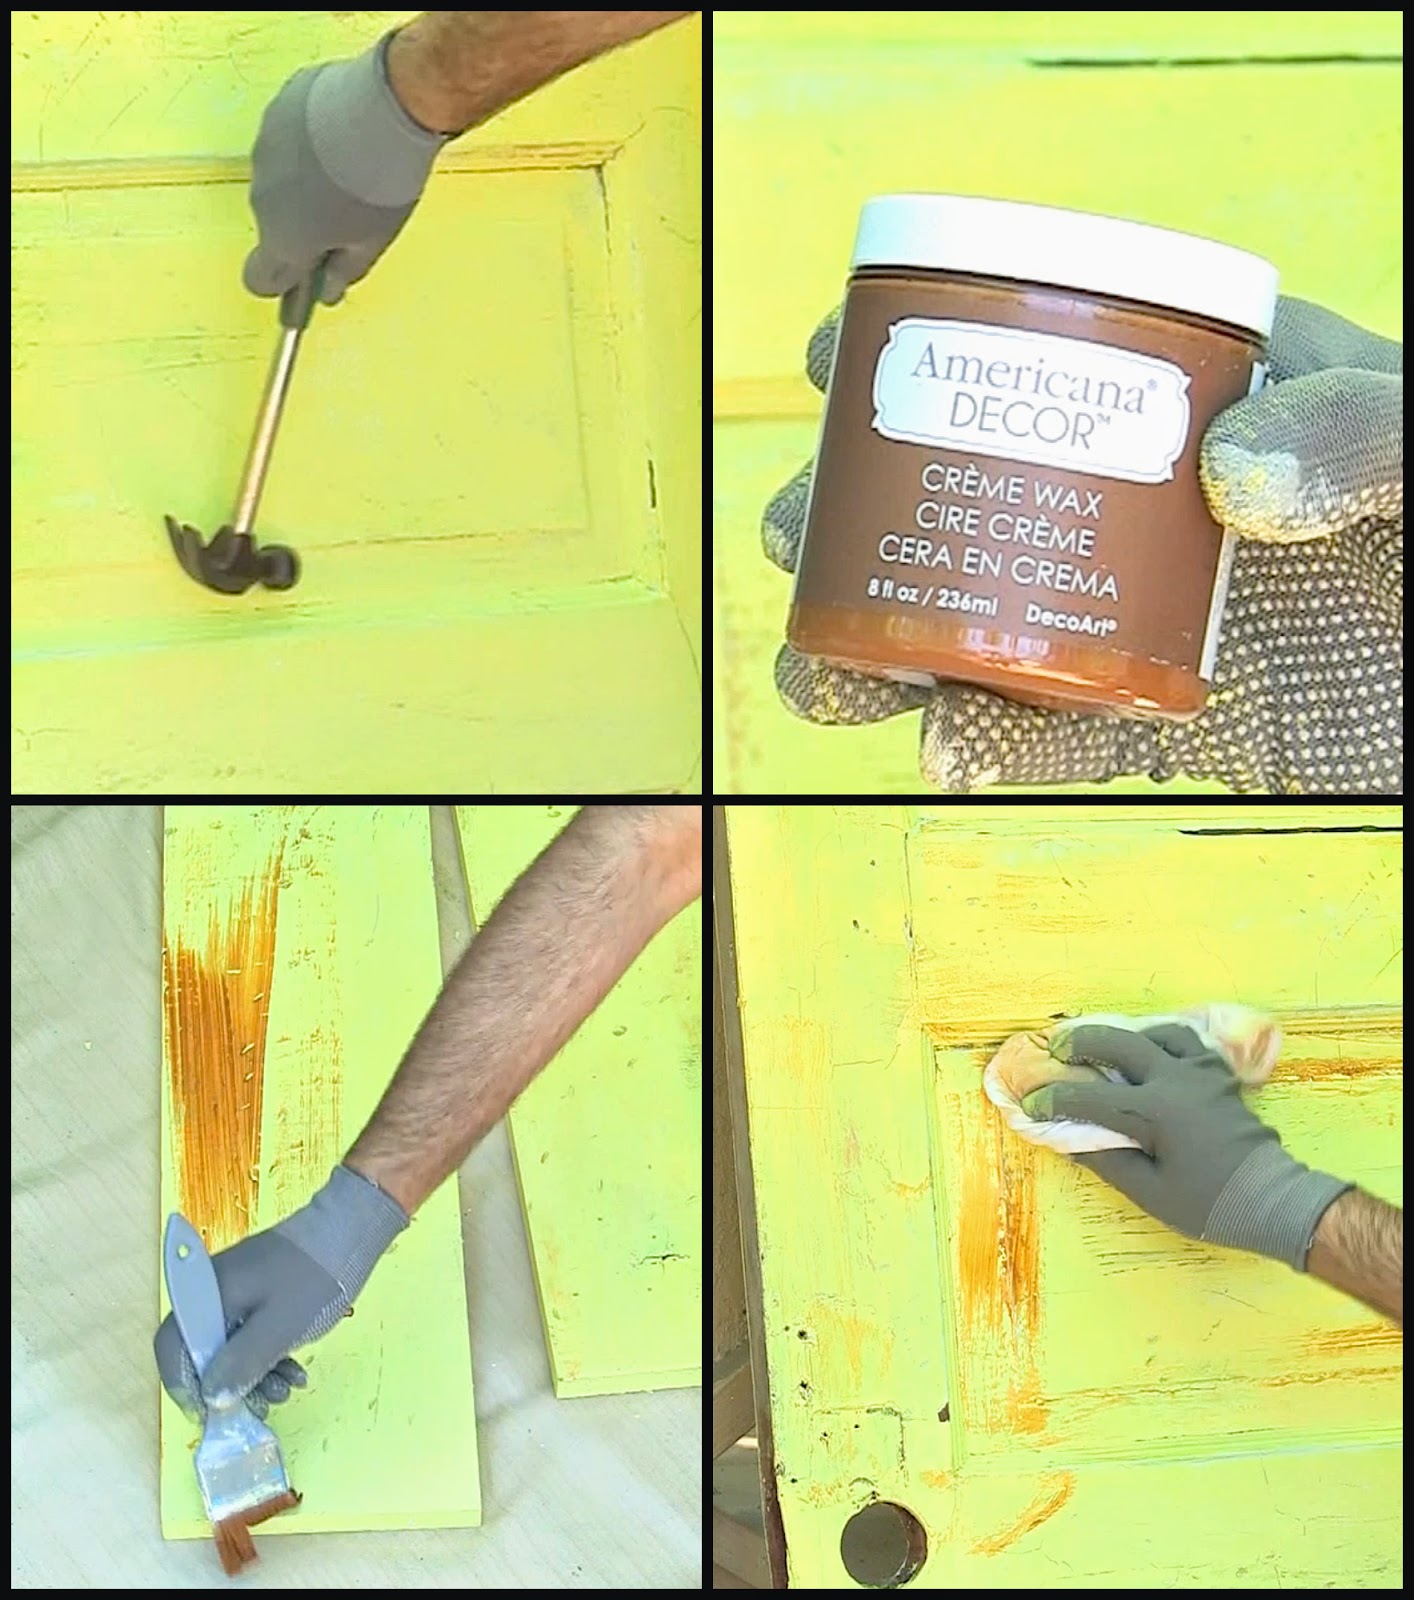
5. Hit and scratch the door with a hammer to age it some more.
6. Paint the creme wax over the door and then rub it off with a cloth.
* This will highlight the scratches and dents and give it more character.

7. Screw your "L" brackets to each of the shelves (2 each should be fine).
8. Apply the shelves to the door.
9. Stencil across the very top of the door and you're done!
I a-door this project Mark! Deco Art Chalky Finish paint is a dream in a jar! Sharing on Totally Green Crafts...thanks for the inspiration!
ReplyDeleteamy*
Amy, you're the best! Thanks so much for sharing this. :)
DeleteGreat for balcony walls also gives me much more space on an already small balcony
ReplyDelete