Is it really GLITTER BLAST TUESDAY ALREADY?
It's time for you to enter to win a set of GLITTER BLAST spray paints with an ongoing contest every other Tuesday from here to eternity. Rock on Krylon!
It's time for you to enter to win a set of GLITTER BLAST spray paints with an ongoing contest every other Tuesday from here to eternity. Rock on Krylon!
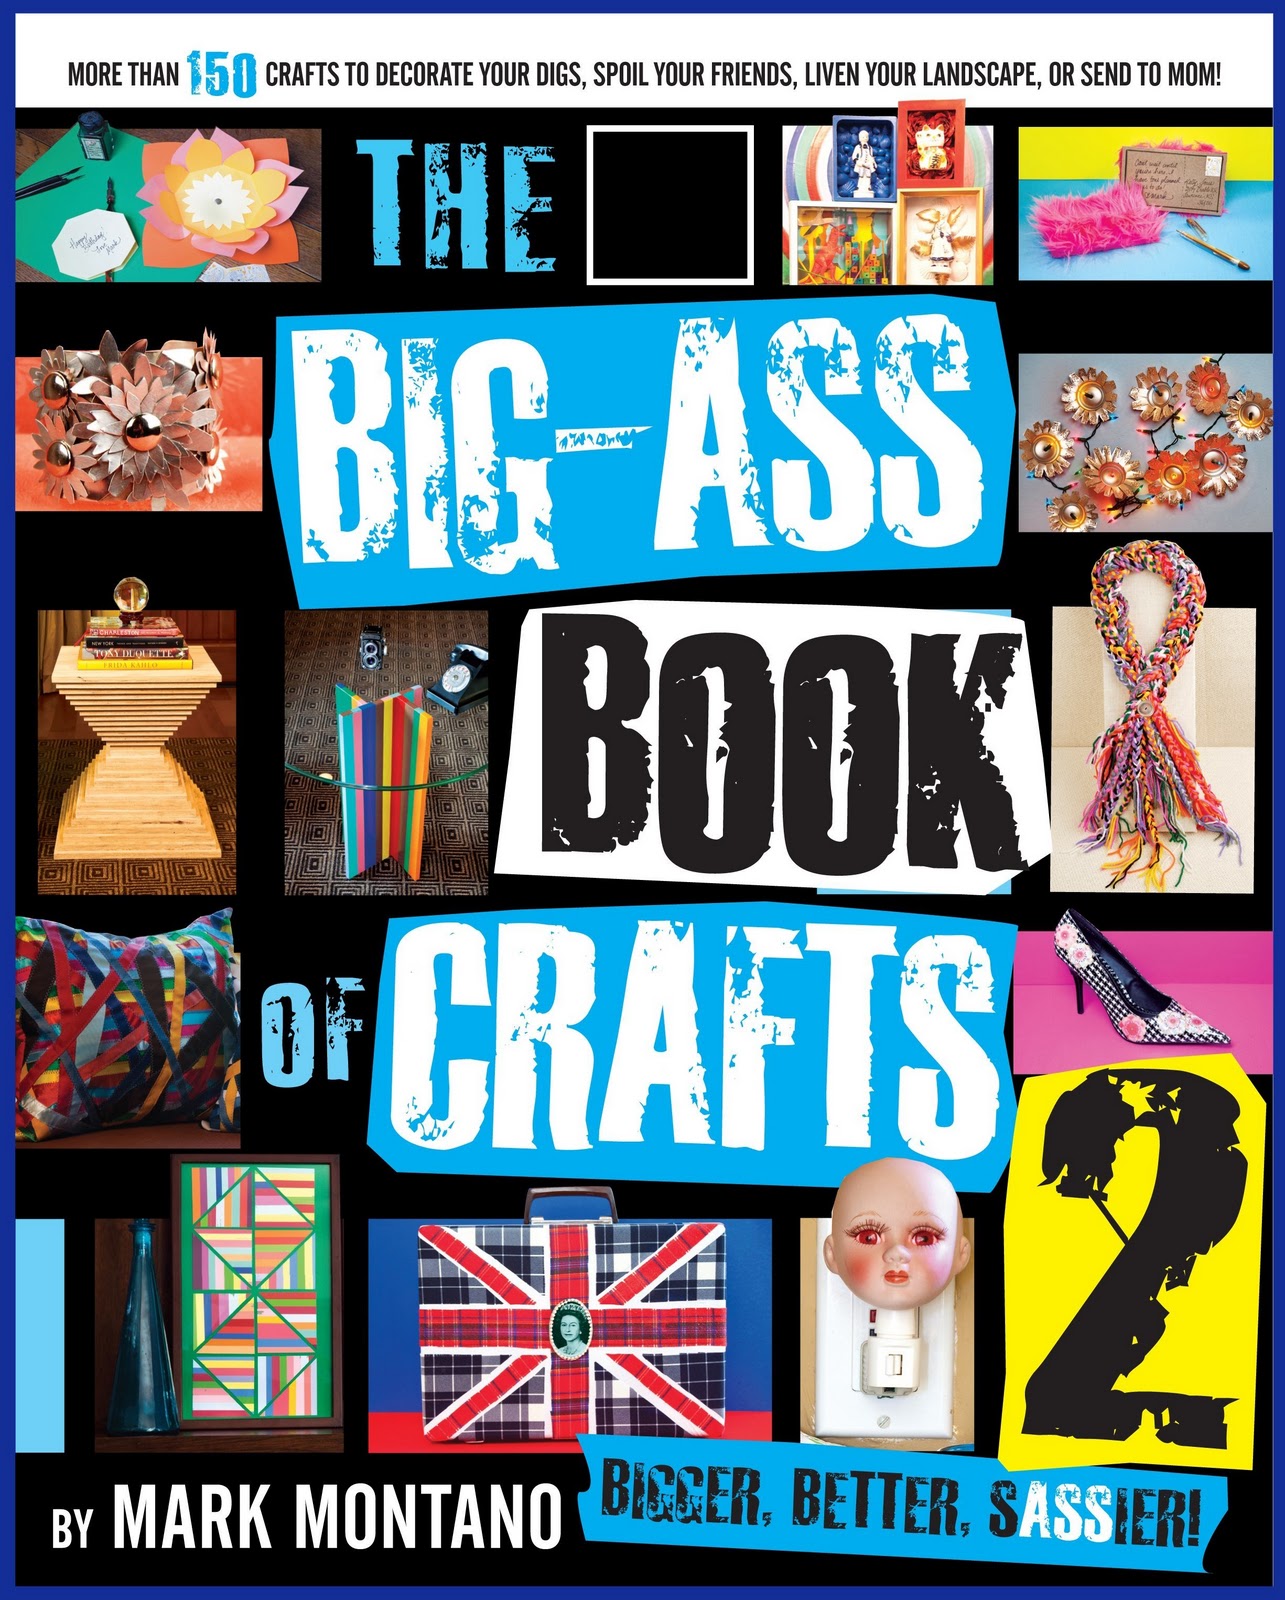
Winners not only get my NEW book,
THE BIG ASS BOOK OF CRAFTS 2,
they'll get all of the colors of glitter blast sent right to their front door.
Just a few simple rules to enter.
THE BIG ASS BOOK OF CRAFTS 2,
they'll get all of the colors of glitter blast sent right to their front door.
Just a few simple rules to enter.
GOOD LUCK!
And may the glitter be with you....


RULES
1. SHARE this on your FB page (by pressing SHARE)
1. SHARE this on your FB page (by pressing SHARE)
2. LIKE and COMMENT on the KRYLON FB page that I sent you!
3. JOIN my blog.
BLOG LINK (Wait, you're here!)
BLOG LINK (Wait, you're here!)
4. COMMENT here that you've done it AND what your favorite spray paint project is.
5. Join me on TWITTER if you haven't.
TWITTER LINK
TWITTER LINK
Keep an eye out for the winner. I'll post it here and on my FB page.
It helps if you can leave a way for me to contact you, too!